Video Filming Setup Checklist for Smooth, Consistent Shoots
A reliable setup routine prevents missed shots, bad audio, and wasted time. Use this checklist-style workflow to prep gear, control light and sound, lock camera settings, and confirm recording before the first take—whether filming at home, in a studio, or on location. For more guidance, see Resources for Video Creation: Planning – Research Guides.
Pre-shoot plan (5 minutes that saves the day)
Consistency starts before you unpack anything. A short planning pass keeps you from changing formats mid-shoot, improvising coverage, or forgetting the ending. For further reading, see Video Preproduction: Planning and Filming Guide.
- Confirm the goal of the shoot: platform, orientation (vertical/horizontal), and target length.
- Write a quick shot list: A-roll (main talking/headline), B-roll (cutaways), and any screen captures.
- Choose location and time: note sun direction, traffic noise windows, and power availability.
- Prepare a simple run-of-show: intro, main points, call to action, and ending frame.
- Decide delivery specs early: resolution (1080p/4K), frame rate (24/30/60), and audio format.
If you want a one-page version you can keep on your phone, the Video Filming Setup Checklist is designed to follow the same order you’ll use on set.
Gear pack and power check
Most “ruined shoot” stories come down to power, storage, or one missing adapter. Pack like you won’t be able to buy anything once you arrive.
- Camera/phone: clean lens, confirm storage space, and enable airplane mode on phones.
- Lenses (if applicable): choose primary focal length; pack a backup option for tight spaces.
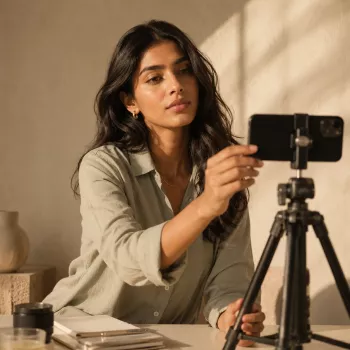
- Stabilization: tripod, plate, quick-release, and any needed tools (hex key/coin).
- Audio kit: mic(s), windscreen, cables/adapters, and a backup recording option when possible.
- Lighting: key light, stand, diffusion, and any clamps or sandbags.
- Power: fully charge batteries, bring spares, and pack chargers/power bank/extension cord.
- Media: formatted SD cards or confirmed internal storage; label cards if multiple.
- Accessories: gaffer tape, lens cloth, small flashlight, and a marker for quick notes.
| Item | Home/Desk | On-location | Notes |
|---|---|---|---|
| Tripod/stabilizer | Required | Required | Add a small tabletop tripod for tight setups |
| Primary mic | Required | Required | Lavalier or shotgun depending on movement |
| Backup audio | Recommended | Highly recommended | Second mic or recorder when possible |
| Key light | Recommended | Required | If relying on window light, bring diffusion anyway |
| Batteries/power | Recommended | Required | Spare batteries + power bank/extension cord |
| Media/storage | Required | Required | Format cards before shoot; bring a spare |
Lighting setup for clean, repeatable results
Lighting doesn’t need to be complicated to be consistent. What matters is repeatability: the same key angle, controlled ambient spill, and steady color.
- Start with one flattering key light at about 45° from the subject; raise slightly above eye level.
- Control ambient light: close blinds, turn off mixed-color bulbs, and avoid overhead lighting when possible.
- Set white balance intentionally (daylight/tungsten/custom) to prevent shifting color between takes.
- Add fill using a reflector or bounce if shadows are too harsh; keep it subtle for natural skin tones.
- Create separation with a back light or practical lamp behind the subject; avoid hot spots.
- Check for reflections: glasses, shiny skin, framed art, and glossy surfaces.
For a solid foundation on production fundamentals, Adobe’s overview of video production basics is a helpful reference when you’re building a repeatable lighting approach.
Audio: the make-or-break step
Viewers will tolerate “good enough” video, but they bounce fast when the sound is echoey, thin, or distorted. Treat audio as your first technical priority, not the last.
If you’re dialing in placement and distance, RØDE’s guide to microphone techniques and placement can help you troubleshoot common issues like rustle, plosives, and hollow room sound.
Camera settings and framing checks
Smartphone shooters can also review YouTube’s guidance on creating videos with a smartphone—especially for quick checks like orientation, stabilization, and avoiding accidental interruptions.
On-set workflow: repeatable “ready to roll” routine
For creators filming try-ons, tutorials, or talking-head content, wardrobe consistency helps edits feel seamless. Planning outfits ahead of time with a capsule can keep colors and styling cohesive across multiple filming days. Options like Summer Capsule for Plus Size or Earth Tones & Naturals for Summer can simplify on-camera looks when you’re batch recording.
Wrap-up and file safety (don’t skip this)
Printable checklist option
A single-page checklist helps keep setup consistent across shoots and reduces forgotten steps. Look for a version that includes packing, lighting, audio, camera settings, and wrap-up in one flow—and that’s easy to print or keep on a phone for quick reference on location. The Video Filming Setup Checklist is a simple add-on to your gear bag that keeps the “ready to roll” routine the same every time.
If you’re batch filming a seasonal series, pairing your setup routine with a pre-built outfit plan like 90 Days of Summer Outfits can also reduce last-minute decisions and keep continuity clean across episodes.
FAQ
What are the most important items to check before hitting record?
Confirm audio with a quick headphone monitor and playback test, then verify stable framing and focus. Lock exposure and white balance, and double-check battery/power plus remaining storage and recording time.
How can a consistent setup be recreated for multiple filming days?
Keep the same camera position and lens choice, note (or save) your camera settings, and photograph light placement so you can rebuild it fast. Using a repeatable checklist and a standardized background makes day-to-day matching much easier.
What’s a simple way to improve audio in an untreated room?
Move the mic closer and reduce noise sources like HVAC, buzzing lights, and notifications. Add soft materials off-camera (blankets, curtains, cushions), record a few seconds of room tone, and monitor with headphones to catch problems early.